Taming the Homelab Chaos: A Guide to Professional-Grade Local Network Management
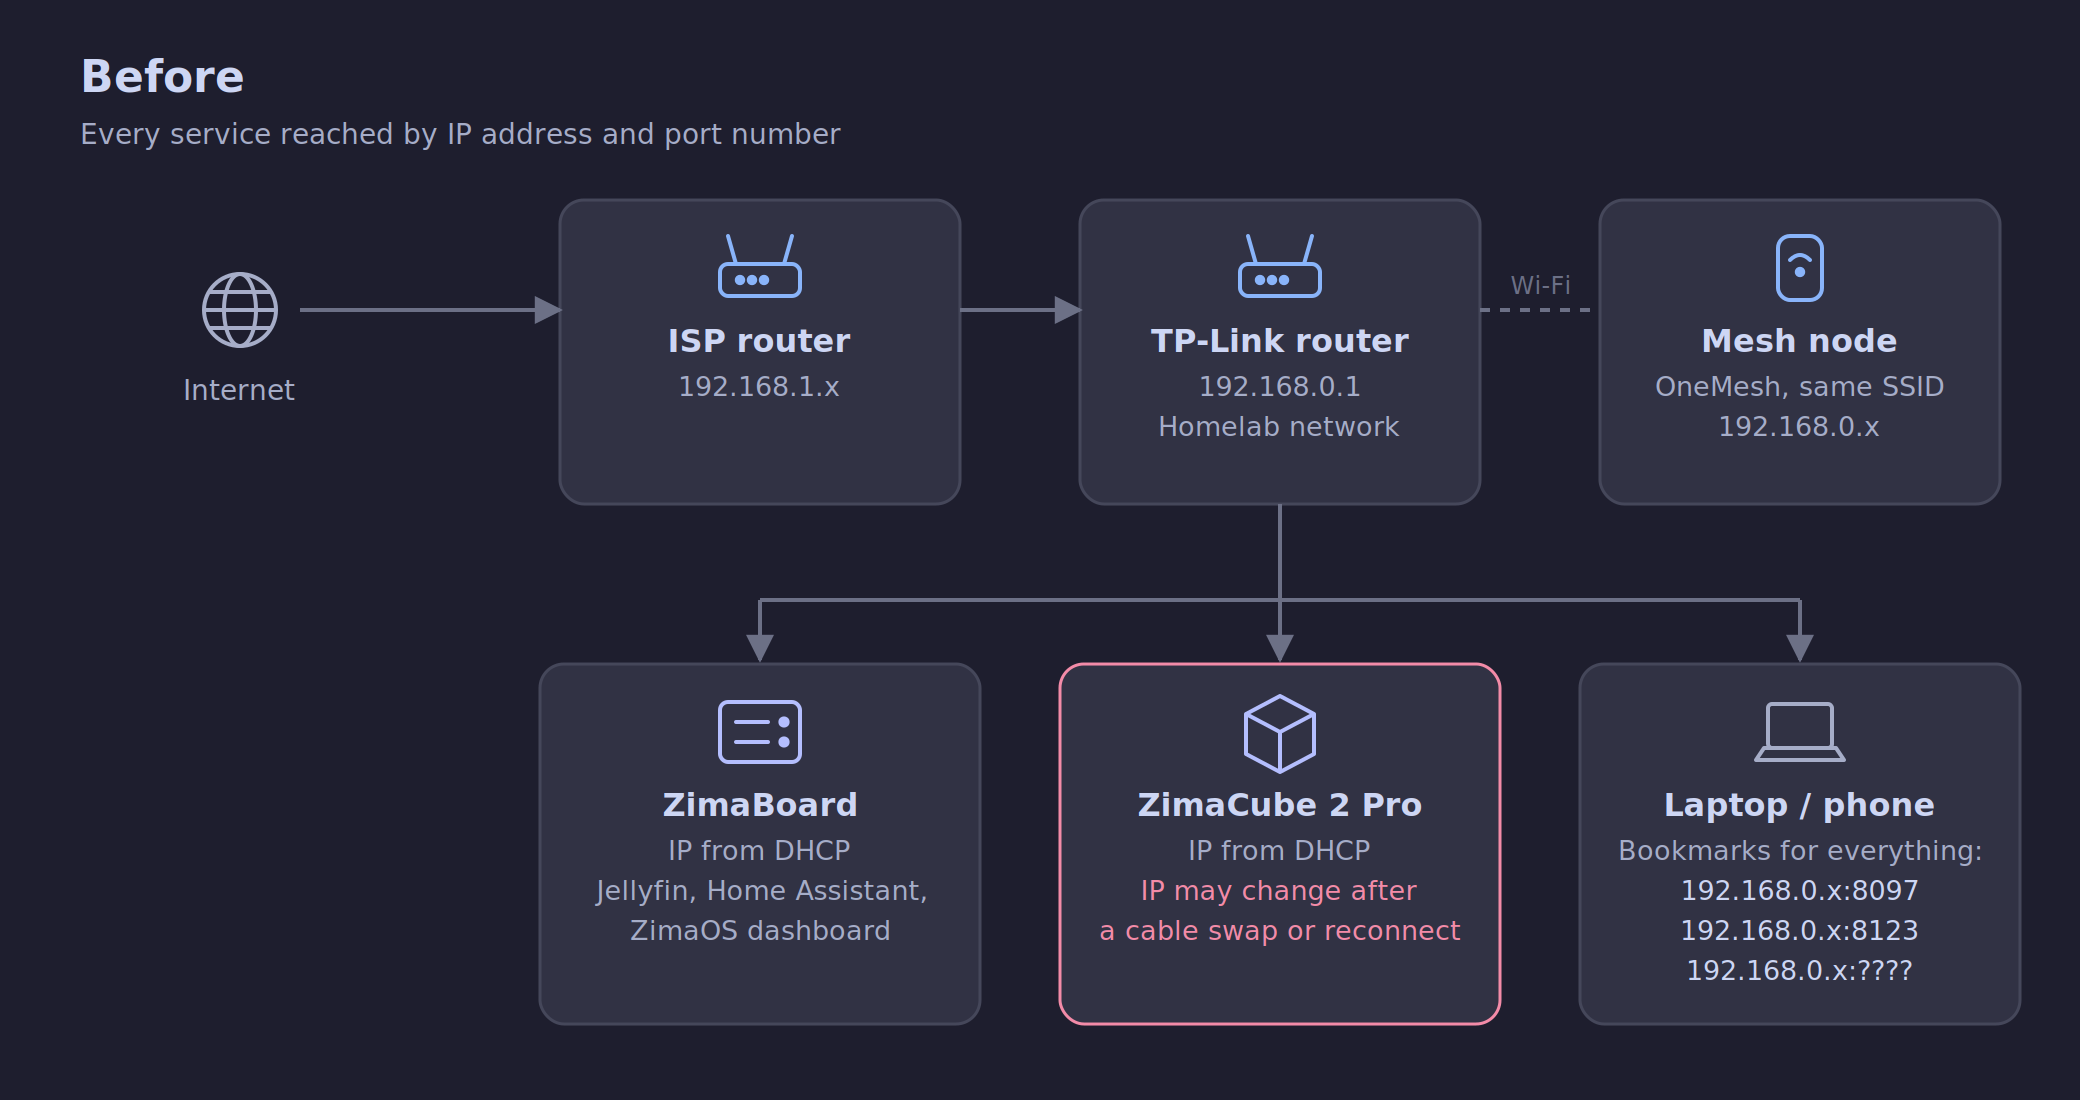
For the uninitiated, the "homelab" journey often begins as a simple quest for convenience. Perhaps you wanted a private media server like Jellyfin, or maybe you sought to centralize your smart home controls via Home Assistant. However, as the number of self-hosted services grows, so does the administrative burden. Managing a cluster of disparate IP addresses and port numbers—such as 192.168.0.x:8097 for movies and 192.168.0.x:8123 for automation—is not merely an annoyance; it is a scalability bottleneck that invites human error.
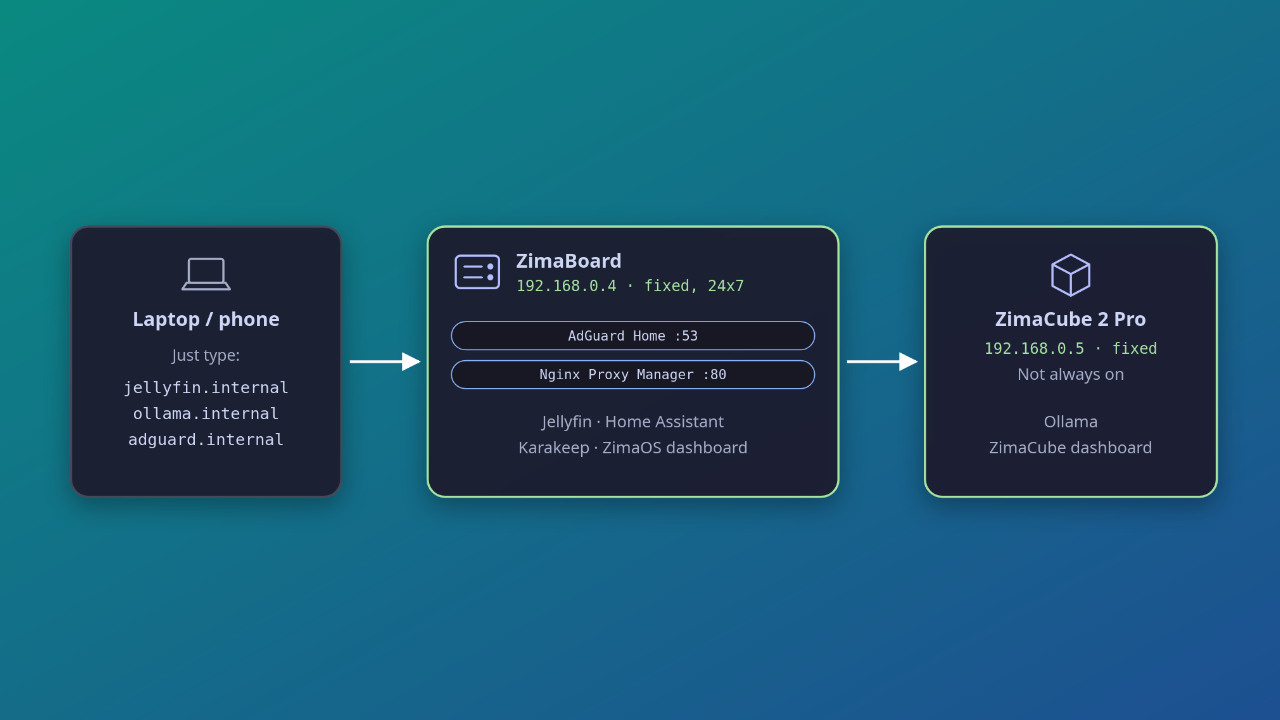
After struggling with dynamic IP assignments and the tedious nature of bookmarking arbitrary port combinations, I undertook a complete network overhaul. By implementing a dedicated local DNS and a robust reverse proxy, I transformed my cluttered lab into a streamlined environment where every service is accessed via a clean, human-readable .internal domain.
Chronology of a Network Transformation
The transition from a chaotic network to a structured one was not an overnight endeavor. It required a methodical approach to ensure stability and maintainability.
Phase 1: Establishing Network Foundations
The primary instability in my initial setup stemmed from the router’s DHCP (Dynamic Host Configuration Protocol) behavior. Devices like my ZimaCube and ZimaBoard would occasionally negotiate new IP addresses after power cycles or firmware updates, effectively "breaking" my saved bookmarks and configurations.

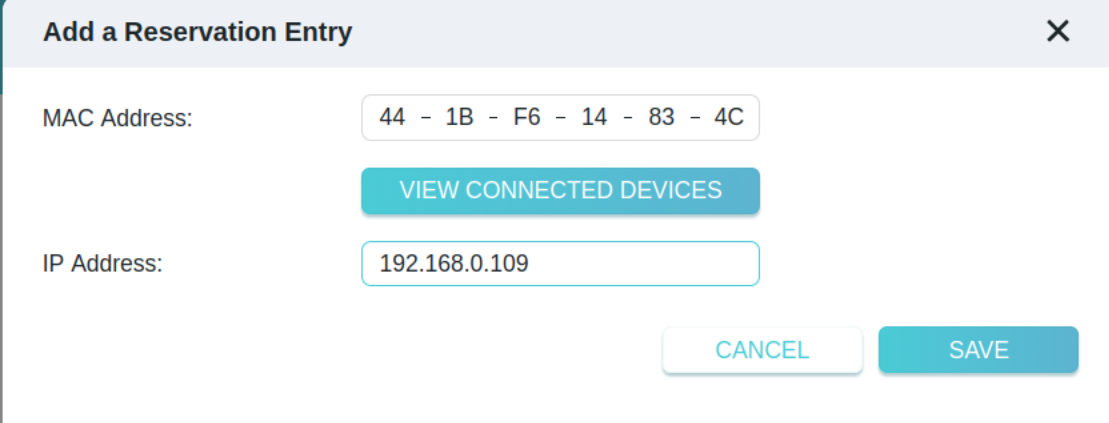
The solution began with Static DHCP Reservations. By accessing my TP-Link router’s "Address Reservation" settings, I locked the IP addresses of my core infrastructure. I adopted a strict addressing scheme:
- Gateway:
192.168.0.1 - Core Server (ZimaBoard):
192.168.0.4(Always-on host) - Secondary Server (ZimaCube):
192.168.0.5 - Dynamic Pool:
192.168.0.10to253(reserved for transient devices)
Phase 2: Deploying AdGuard Home as the DNS Authority
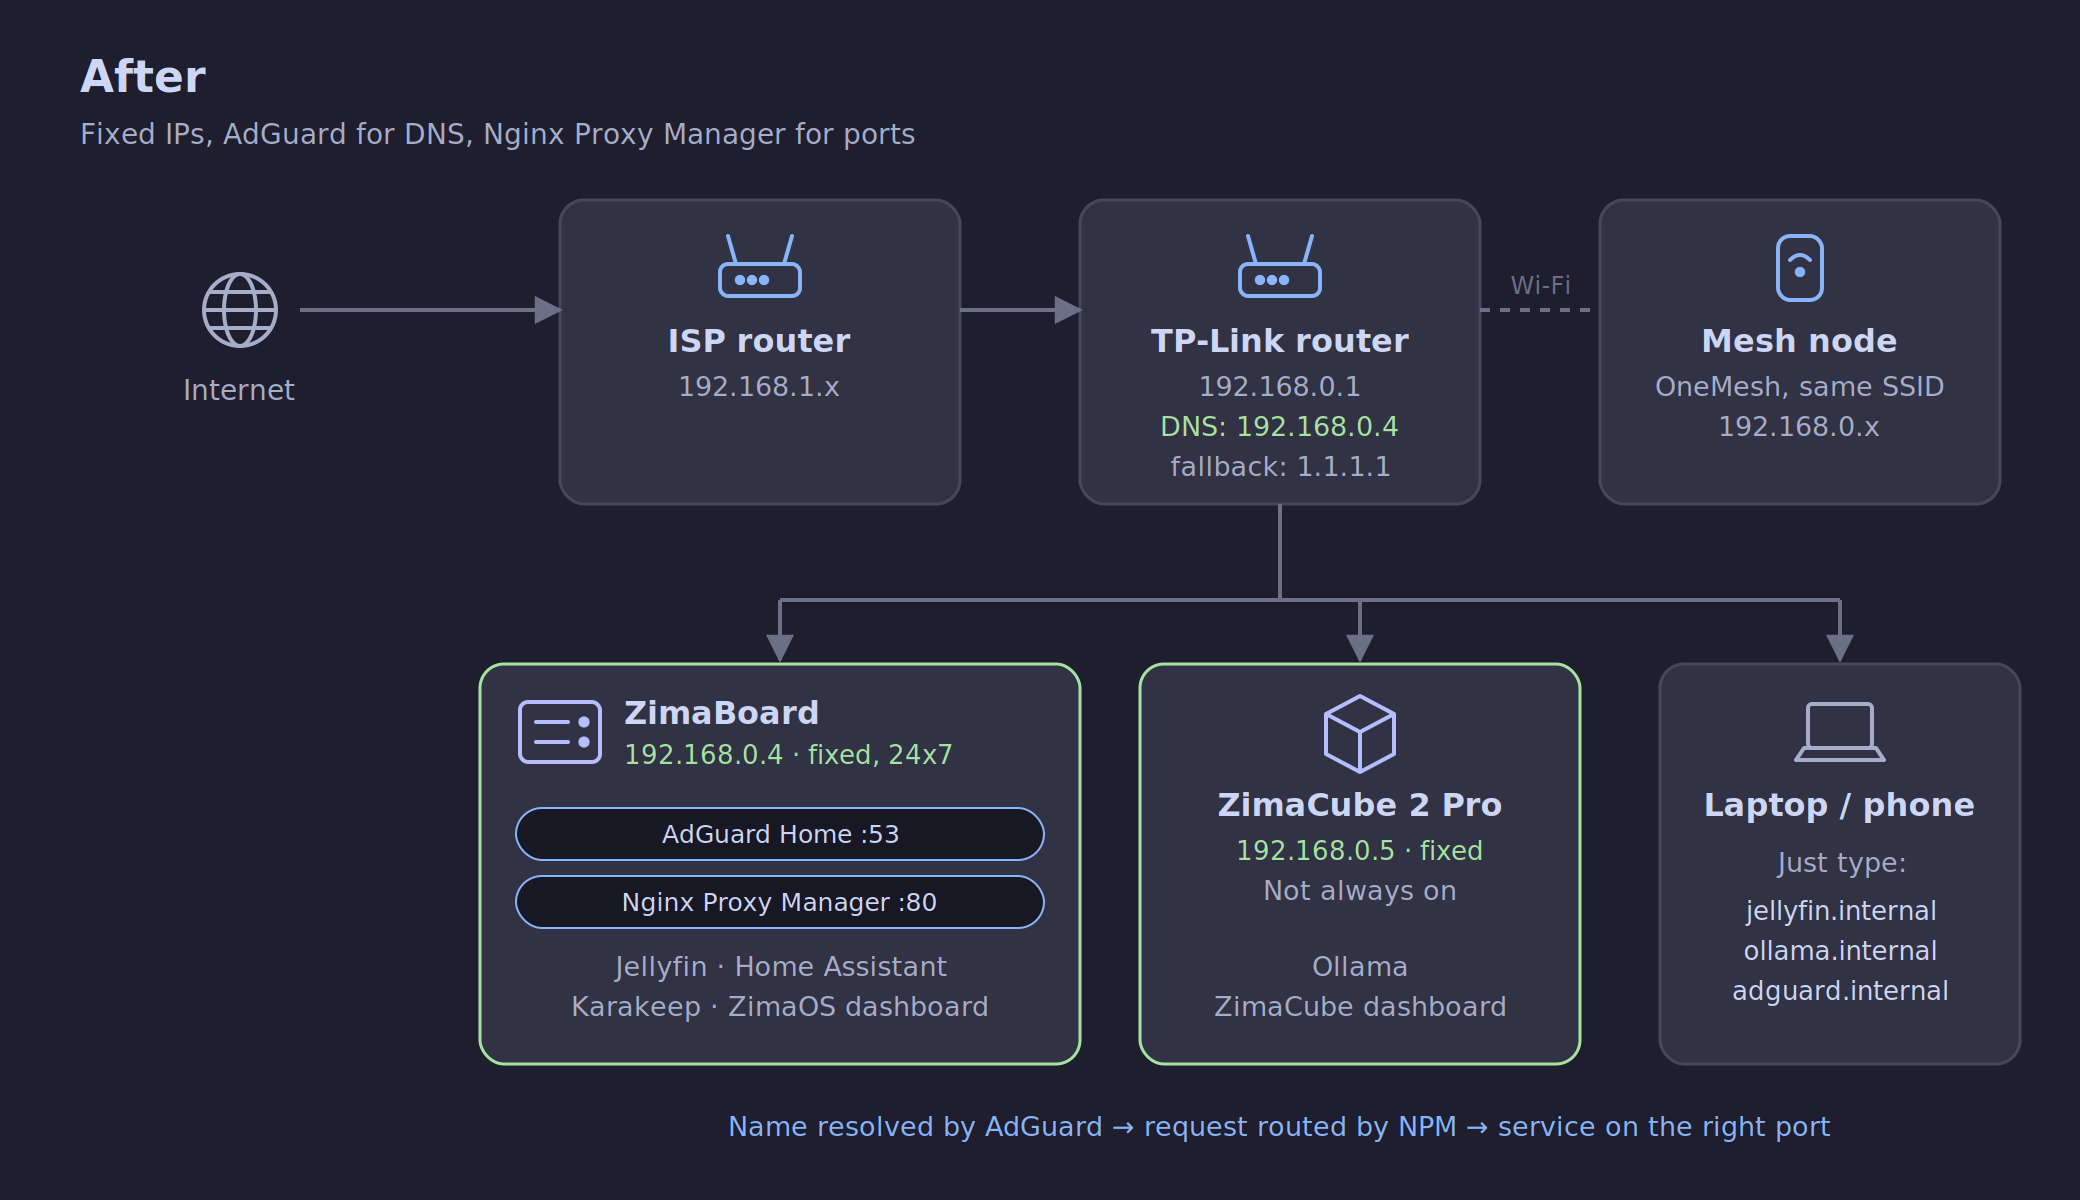
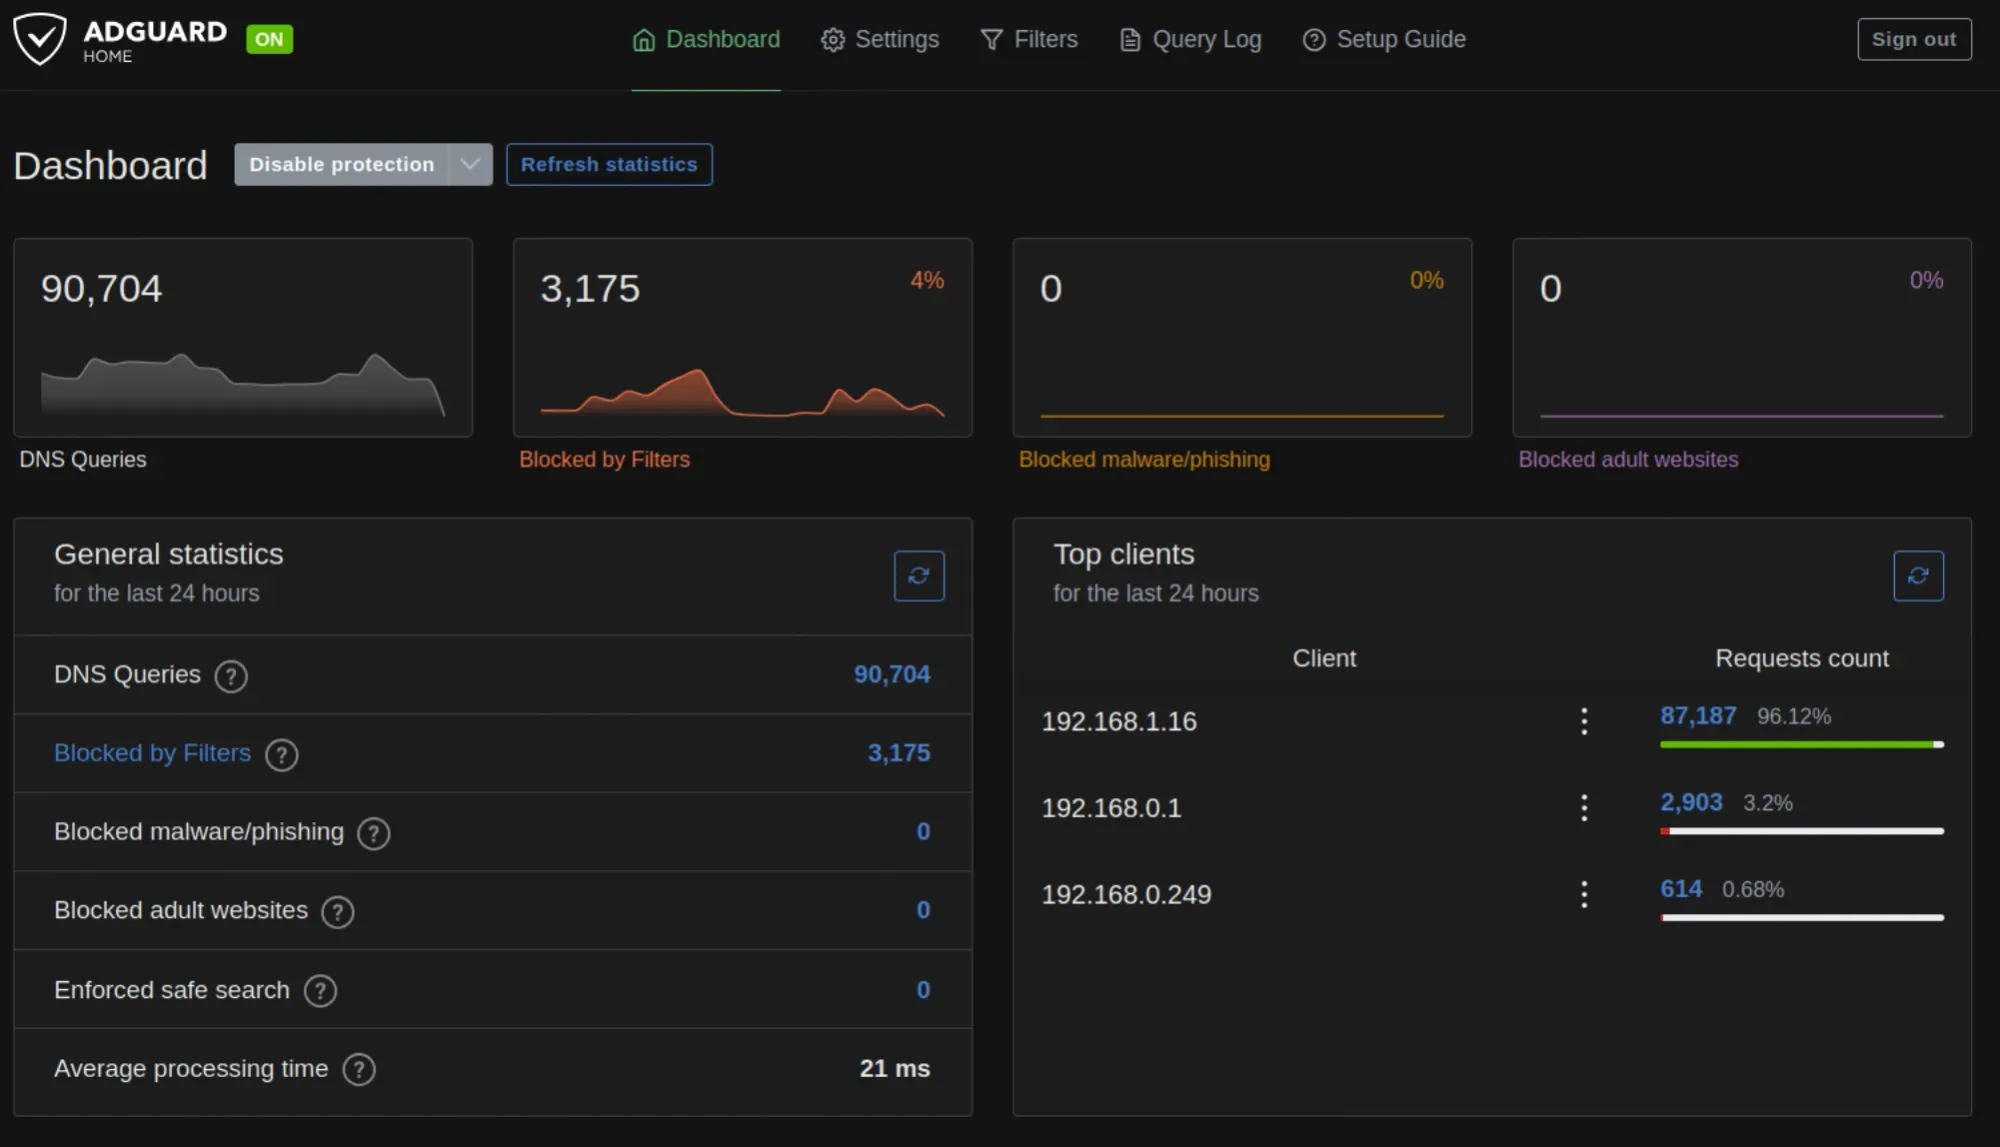
With fixed IPs in place, the next step was to centralize domain resolution. AdGuard Home was selected for its balance of performance and ease of use. By installing AdGuard in "host mode"—which allows the container to bind directly to port 53—I ensured that DNS queries were handled without the overhead of Docker’s NAT layer.
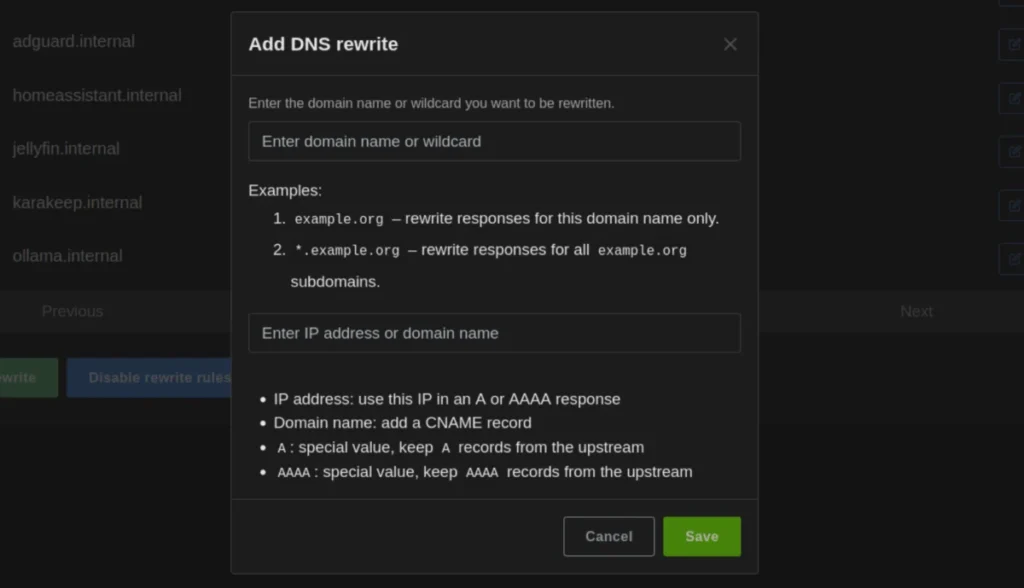
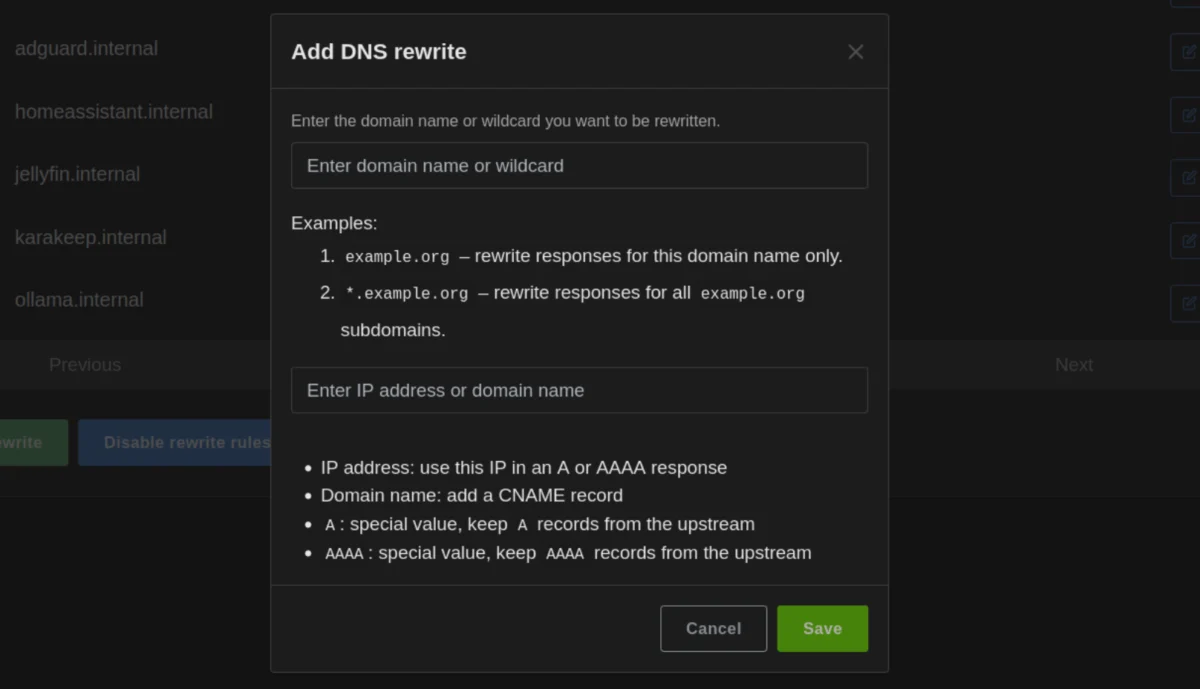
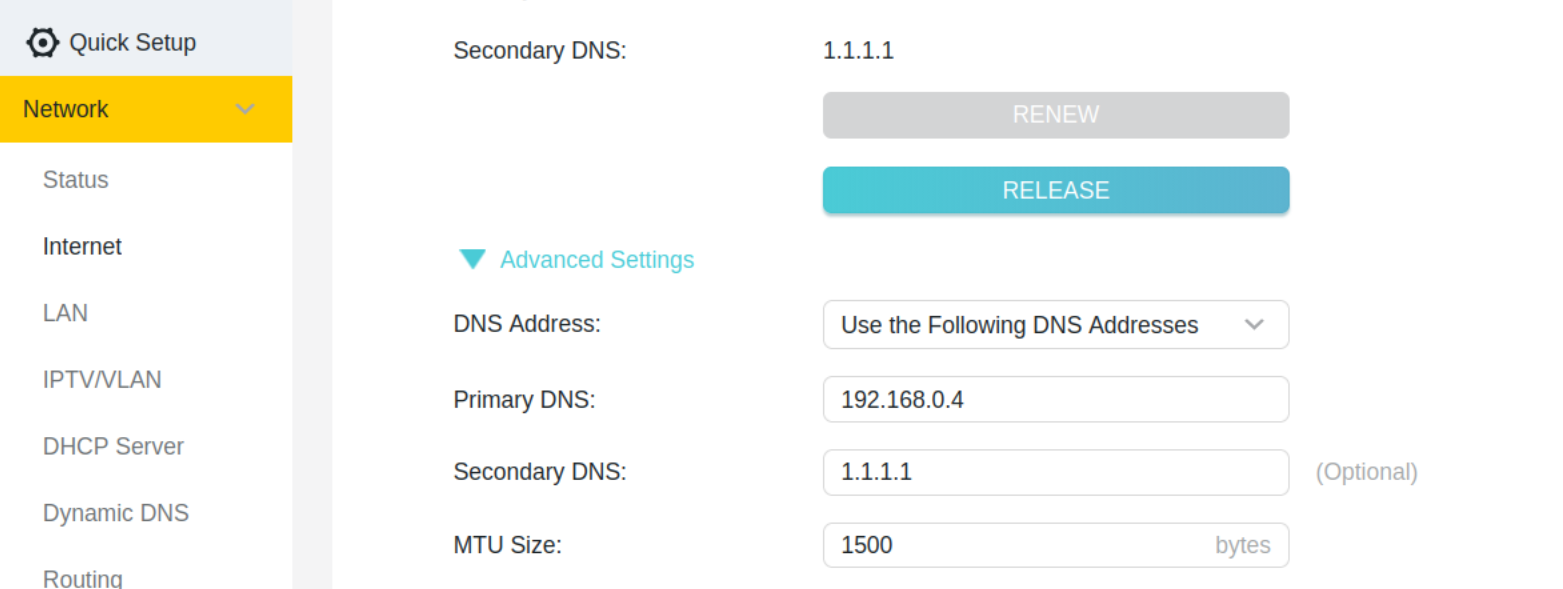
Crucially, I reconfigured the router to point its primary DNS to the ZimaBoard’s IP. This forced all network traffic through AdGuard, providing a single pane of glass for monitoring queries and, more importantly, allowing for custom "DNS Rewrites."
Phase 3: Implementing Nginx Proxy Manager
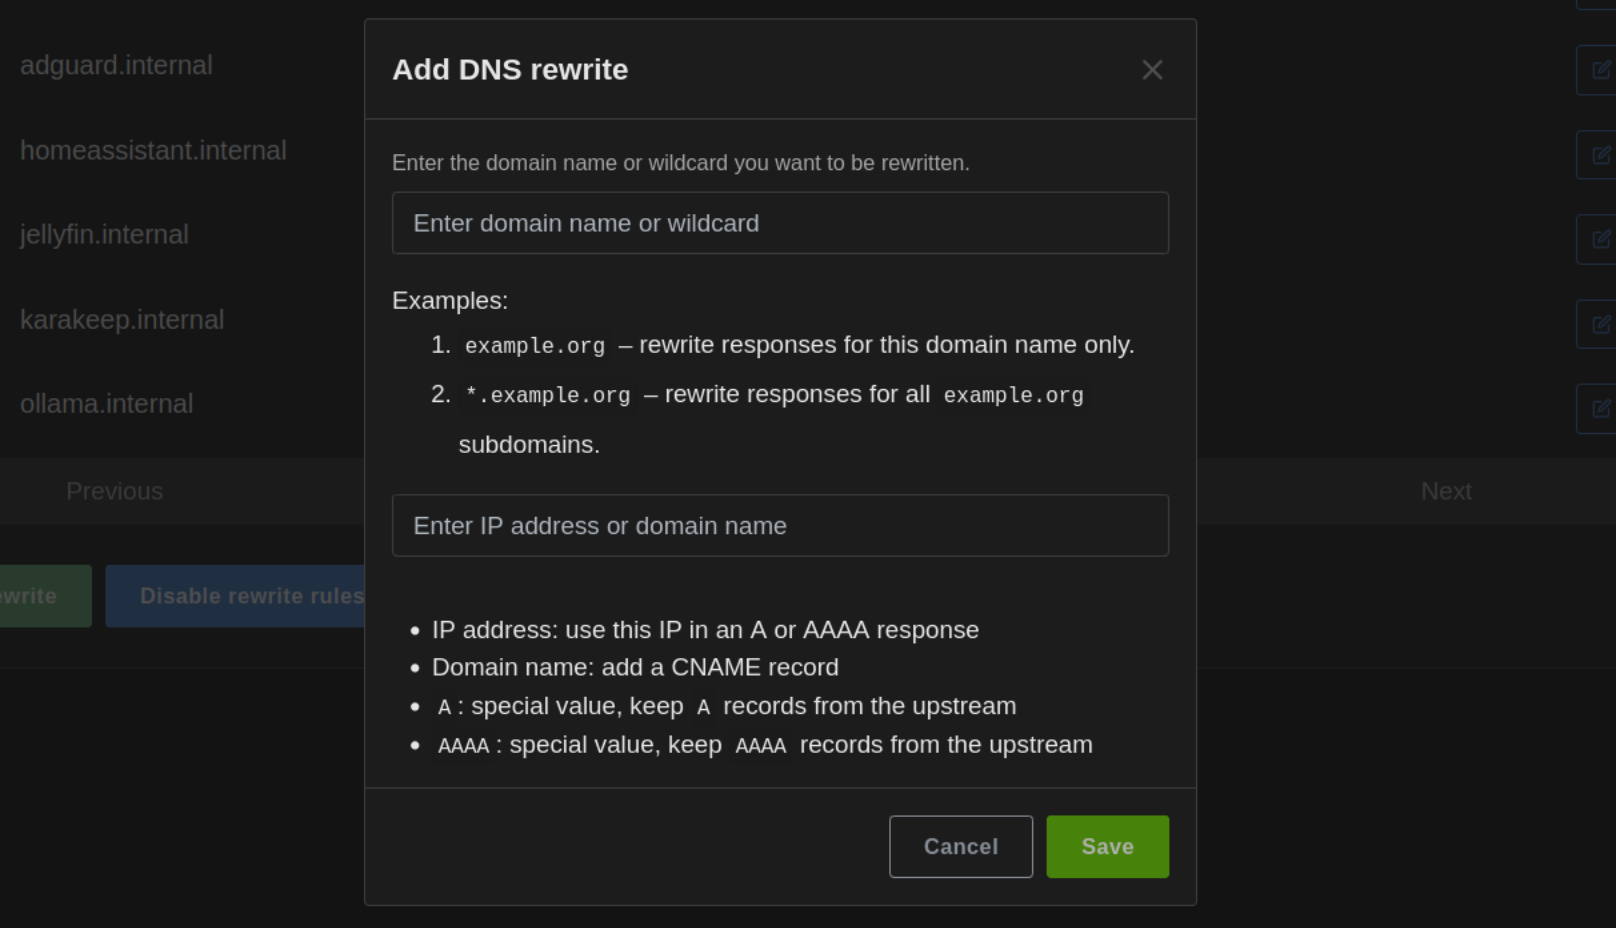
While DNS handles mapping a name (like jellyfin.internal) to an IP address, it cannot distinguish between service ports. To solve this, I deployed Nginx Proxy Manager (NPM). By configuring NPM to listen on standard web ports (80/443) and setting up "Proxy Hosts," I could route incoming traffic based on the requested domain name. This effectively removed the need to ever type a colon followed by a port number again.
Supporting Data: The Technical Architecture
To ensure this setup remains functional, it is vital to understand the interaction between the software layers involved.
| Component | Role | Logic |
|---|---|---|
| AdGuard Home | DNS Server | Resolves service.internal to 192.168.0.4 |
| Nginx Proxy Manager | Reverse Proxy | Routes request to internal ports (e.g., 8097) |
| ZimaOS Gateway | Management UI | Relocated to port 8888 to free up port 80 |
Resolving Port Conflicts
In any dense homelab environment, port conflicts are inevitable. During this project, I encountered multiple instances where existing services (such as an old Pi-hole container or the ZimaOS dashboard) were competing for port 80. The most efficient way to debug these conflicts is via the command line:
sudo ss -tulpn | grep :80This command identifies exactly which process is occupying a port. If the culprit is a Docker container, one can cross-reference it with sudo docker ps to determine if the container should be decommissioned or if the service should be migrated to a different port.
Implications for Future-Proofing
The choice of the .internal domain suffix is deliberate. While many users default to .local, that TLD is reserved for mDNS (Multicast DNS) protocols like Apple’s Bonjour or Avahi. Using .local can lead to unpredictable network behavior where hostnames fail to resolve correctly across different operating systems.
In 2024, ICANN officially reserved .internal for private, non-routable networks. Adopting this standard ensures that my local homelab configuration will not clash with future public domain registrations or standardized networking protocols.
The "400 Bad Request" Scenario
One of the most significant implications of using a reverse proxy is the security layer enforced by many self-hosted applications. For instance, Home Assistant will, by default, reject requests from a proxy to prevent header spoofing.
To resolve this, I had to modify the configuration.yaml file within Home Assistant to explicitly trust the proxy’s IP address on the Docker bridge network. This underscores a vital reality for sysadmins: as you abstract the network, you must ensure that your applications are "proxy-aware."
Lessons Learned and Best Practices
Building a professional-grade internal network is an iterative process. Based on my experience, there are several key takeaways for those looking to replicate this setup:
- Trust the Logs: If a service stops working—such as my experience with Netflix telemetry being blocked by AdGuard—the query log is your primary diagnostic tool. Never assume a failure is due to a misconfiguration until the logs have been consulted.
- Avoid Hardcoding: By moving away from IP-based access, I have effectively future-proofed my workflow. If I ever decide to migrate my media server to more powerful hardware, I only need to update the DNS rewrite and the proxy host setting. The end-user experience remains unchanged.
- The "Safety Net" Trade-off: While I set a secondary DNS (1.1.1.1) for redundancy, I acknowledged the trade-off: if the ZimaBoard goes down, the secondary DNS will not know how to resolve
.internaladdresses. This is an acceptable compromise for home use, but it highlights the dependency on the "always-on" host.
Conclusion
The transition to a managed .internal network is more than a convenience feature; it is a shift from "hacking" a network to "architecting" one. By leveraging tools like AdGuard Home and Nginx Proxy Manager, I have eliminated the "medieval torture" of typing complex IP addresses into television remotes and browser bars.
While this setup is tailored to my specific Zima-based hardware, the underlying principles apply to any homelab running Linux and Docker. Whether you are managing two services or twenty, the effort spent on DNS and proxy management pays for itself in reduced frustration and a more professional, reliable digital environment. As I look toward my next project—implementing HTTPS for my local services—I am confident that the foundation I have built is robust enough to handle whatever comes next.